Domain, Routing, Cache, HTTPS (Production Ready)
Contents
- 1 1. Peran /etc/nginx/conf.d/*.conf
- 2 2. Struktur Direktori yang Direkomendasikan
- 3 3. Virtual Domain Dasar (HTTP)
- 4 4. Install SSL Otomatis (Let’s Encrypt)
- 5 5. Lokasi File SSL Let’s Encrypt
- 6 6. Virtual Domain HTTPS (Final – Production)
- 7 7. Auto Renewal SSL
- 8 8. Permission & Security SSL
- 9 9. Multi Domain SSL (SAN)
- 10 10. Workflow Aman (Domain + SSL)
- 11 11. Kesalahan Umum (HINDARI)
- 12 12. Ringkasan Arsitektur Final
- 13 Kesimpulan
- 14 Related Posts
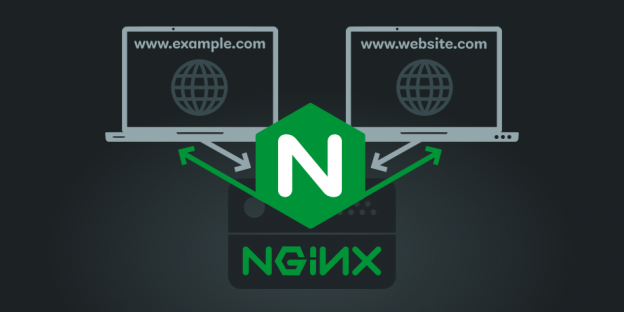
1. Peran /etc/nginx/conf.d/*.conf
Direktori ini digunakan untuk:
- Mengatur domain
- Routing request
- Cache policy
- SSL / HTTPS
- Rate limit per domain
📌 Prinsip utama
nginx.conf→ global & jarang diubahconf.d/*.conf→ sering diubah, aman untuk operasional harian
2. Struktur Direktori yang Direkomendasikan
/etc/nginx/
├── nginx.conf
├── conf.d/
│   ├── example.com.conf
│   ├── api.example.com.conf
│   └── ip.conf
1 domain = 1 file
3. Virtual Domain Dasar (HTTP)
nano /etc/nginx/conf.d/example.com.confSelanjutnya isi dengan:
server {
    listen 80;
    server_name example.com www.example.com;

    root /var/www/example.com;
    index index.html;

    location / {
        try_files $uri $uri/ /index.html;
    }
}
Ini cukup untuk:
- Test domain
- Persiapan SSL
- Static site
Selanjutnya membuat file folder:
sudo mkdir -p /var/www/example.com
sudo chown -R www-data:www-data /var/www/example.com
sudo chmod -R 755 /var/www/example.com
4. Install SSL Otomatis (Let’s Encrypt)
4.1 Install Certbot + Plugin Nginx
Ubuntu / Debian
sudo apt update
sudo apt install certbot python3-certbot-nginx -y
RHEL / Rocky / Alma
sudo dnf install certbot python3-certbot-nginx -y
4.2 Pastikan Domain Sudah Aktif
Cek:
curl http://example.com
Harus bisa diakses publik.
4.3 Generate SSL (OTOMATIS)
sudo certbot --nginx -d example.com --no-redirectCertbot akan:
- Verifikasi domain
- Generate sertifikat
- Edit file Nginx otomatis
- Menambahkan redirect HTTPS
📌 Pilih:
Redirect HTTP to HTTPS → YES
5. Lokasi File SSL Let’s Encrypt
/etc/letsencrypt/live/example.com/
├── fullchain.pem
├── privkey.pem
📌 JANGAN DIPINDAH
Nginx hanya membaca file ini.
6. Virtual Domain HTTPS (Final – Production)
📍 /etc/nginx/conf.d/example.com.conf
Di bawah ini aku kasih VERSI LENGKAP + PRODUCTION-READY, tetap rapi, dan mudah dipilih sesuai stack.
Semua masih 1 file virtual domain.
1️⃣ TEMPLATE UMUM (BASE – WAJIB ADA)
Semua stack pakai base ini.
server {
    listen 80;
    server_name example.com www.example.com;
    return 301 https://$host$request_uri;
}

server {
    listen 443 ssl http2 reuseport backlog=65535;
    server_name example.com www.example.com;

    ssl_certificate     /etc/letsencrypt/live/example.com/fullchain.pem;
    ssl_certificate_key /etc/letsencrypt/live/example.com/privkey.pem;

    ssl_protocols TLSv1.2 TLSv1.3;
    ssl_session_cache shared:SSL:50m;
    ssl_session_timeout 1d;
    ssl_session_tickets off;

    root /var/www/example.com;
    index index.php index.html;

    limit_conn conn_limit 100;
    limit_req zone=req_limit burst=100 nodelay;

    access_log /var/log/nginx/example.com.access.log;
    error_log  /var/log/nginx/example.com.error.log warn;

    location ~ /\. {
        deny all;
    }

    location ~* \.(env|log|ini|conf|sql|bak)$ {
        deny all;
    }
}
⬆️ Ini selalu dipakai
2️⃣ PHP & CODEIGNITER (PHP-FPM)
Tambahkan DI DALAM server block di atas:
    location / {
        try_files $uri $uri/ /index.php?$query_string;
    }

location ~ \.php$ {

try_files $uri =404;
    include fastcgi_params;
    fastcgi_pass unix:/run/php/php7.4-fpm.sock;
    fastcgi_param SCRIPT_FILENAME $document_root$fastcgi_script_name;

        fastcgi_buffers 16 16k;
        fastcgi_buffer_size 32k;
        fastcgi_read_timeout 60s;
    }
📌 Cocok untuk:
- CodeIgniter 3 / 4
- Laravel
- Slim
- PHP Native
3️⃣ WORDPRESS (OPTIMIZED)
Tambahkan khusus WordPress:
# Location block to handle the main site routing and PHP handling
    location / {
        try_files $uri $uri/ /index.php?$args;
    }

    # Unified PHP handling for wp-admin and general PHP files
    location ~ \.php$ {
        try_files $uri =404;
        include fastcgi_params;
        fastcgi_pass unix:/run/php/php8.2-fpm.sock;
        fastcgi_param SCRIPT_FILENAME $document_root$fastcgi_script_name;
    }

    # Static assets (css, js, image files) caching and optimization
    location ~* \.(css|js|png|jpg|jpeg|gif|ico|woff2?|svg)$ {
        expires 365d;
        access_log off;
        add_header Cache-Control "public, immutable";
    }

    # Security: Deny access to wp-config.php
    location ~* wp-config.php {
        deny all;
    }
📌 WordPress:
- Tidak pakai
=404 - Semua routing lewat
index.php
4️⃣ NODE.JS (Reverse Proxy)
Jika backend Node.js di 127.0.0.1:3000
    location / {
        proxy_pass http://127.0.0.1:3000;
        proxy_http_version 1.1;

        proxy_set_header Host $host;
        proxy_set_header X-Real-IP $remote_addr;
        proxy_set_header X-Forwarded-For $proxy_add_x_forwarded_for;
        proxy_set_header X-Forwarded-Proto $scheme;

        proxy_set_header Upgrade $http_upgrade;
        proxy_set_header Connection "upgrade";

        proxy_connect_timeout 5s;
        proxy_read_timeout 60s;
        proxy_send_timeout 60s;
    }
📌 Cocok untuk:
- Express
- NestJS
- Fastify
- Next.js (SSR)
5️⃣ STATIC + NODE.JS (HYBRID)
    location ~* \.(css|js|png|jpg|jpeg|gif|ico|woff2?|svg)$ {
        root /var/www/example.com/public;
        expires 365d;
        access_log off;
    }

    location / {
        proxy_pass http://127.0.0.1:3000;
    }
📌 Static dilayani Nginx → Node fokus logic
6️⃣ FULL FILE – PHP, WP + CodeIgniter
server {
    listen 80;
    server_name example.com www.example.com;
    return 301 https://$host$request_uri;
}

server {
    listen 443 ssl http2 reuseport backlog=65535;
    server_name example.com www.example.com;

    # SSL Configuration
    ssl_certificate     /etc/letsencrypt/live/example.com/fullchain.pem;
    ssl_certificate_key /etc/letsencrypt/live/example.com/privkey.pem;
    ssl_protocols TLSv1.2 TLSv1.3;
    ssl_ciphers 'ECDHE-ECDSA-AES128-GCM-SHA256:ECDHE-RSA-AES128-GCM-SHA256:ECDHE-ECDSA-AES128-SHA256:ECDHE-RSA-AES128-SHA256';
    ssl_prefer_server_ciphers on;
    ssl_session_cache shared:SSL:50m;
    ssl_session_timeout 1d;
    ssl_session_tickets off;

    # HSTS (HTTP Strict Transport Security)
    add_header Strict-Transport-Security "max-age=31536000; includeSubDomains" always;
    # OCSP Stapling
    ssl_stapling on;
    ssl_stapling_verify on;

    # Web Root and Index
    root /var/www/example.com;
    index index.php index.html;

    # Logs
    access_log /var/log/nginx/example.com.access.log;
    error_log  /var/log/nginx/example.com.error.log warn;

    # File Access Restrictions
    location ~ /\. {
        deny all;
    }

    location ~* \.(env|log|ini|conf|sql|bak)$ {
        deny all;
    }

    # WordPress Configuration
    location / {
        try_files $uri $uri/ /index.php?$args;
    }

    # PHP-FPM Configuration
    location ~ \.php$ {
        try_files $uri =404;
        include /etc/nginx/fastcgi_params;
        fastcgi_pass unix:/run/php/php7.4-fpm.sock;
        fastcgi_param SCRIPT_FILENAME $document_root$fastcgi_script_name;

        # FastCGI Buffer Settings
        fastcgi_buffers 16 16k;
        fastcgi_buffer_size 32k;
        fastcgi_read_timeout 60s;
    }

    # Static File Caching (CSS, JS, images, fonts)
    location ~* \.(css|js|png|jpg|jpeg|gif|ico|woff2?|svg)$ {
        expires 365d;
        access_log off;
        add_header Cache-Control "public, immutable";
    }

    # wp-config.php Protection
    location ~* wp-config.php {
        deny all;
    }

    # CI3 Rekrutmen ID
    location /rekrutmenID/ {
        try_files $uri $uri/ /rekrutmenID/index.php?$query_string;
    }

    # Disable access to hidden files
    location ~ /\. {
        deny all;
    }

    # Prevent execution of dangerous file types
    location ~* \.(env|log|ini|conf|sql|bak)$ {
        deny all;
    }

    # Enable GZIP Compression
    gzip on;
    gzip_vary on;
    gzip_proxied any;
    gzip_comp_level 6;
    gzip_buffers 16 8k;
    gzip_http_version 1.1;
    gzip_types text/plain text/css application/javascript application/json application/xml application/xml+rss text/javascript;
}
Seting IP defult akses: ip.conf
server {
listen 80 default_server;
server_name _; # defult
root /usr/share/nginx/html;   # folder default Nginx
index index.html;
}
7. Auto Renewal SSL
Certbot sudah otomatis, tapi perlu diverifikasi.
Cek timer
systemctl list-timers | grep certbot
Test renewal
sudo certbot renew --dry-run
Jika sukses → aman 100%
8. Permission & Security SSL
sudo chmod -R 700 /etc/letsencrypt
sudo chown -R root:root /etc/letsencrypt
📌 Private key hanya boleh dibaca root
9. Multi Domain SSL (SAN)
certbot --nginx \
-d example.com \
-d www.example.com \
-d api.example.com
Semua domain:
- 1 sertifikat
- Lebih efisien
10. Workflow Aman (Domain + SSL)
# backup
cp /etc/nginx/conf.d/example.com.conf \
   /etc/nginx/conf.d/example.com.conf.bak

# edit
nano /etc/nginx/conf.d/example.com.conf

# test
nginx -t

# reload
systemctl reload nginx
11. Kesalahan Umum (HINDARI)
❌ Install SSL sebelum domain aktif
❌ Restart nginx (pakai reload)
❌ Edit file SSL manual
❌ Lupa auto-renew
❌ Simpan private key sembarangan
12. Ringkasan Arsitektur Final
| Layer | Fungsi |
|---|---|
| nginx.conf | Performa global |
| conf.d/*.conf | Domain & SSL |
| certbot | SSL automation |
| systemd | Reload tanpa downtime |
Kesimpulan
Dengan setup ini kamu mendapatkan:
- 🔒 HTTPS otomatis & gratis
- ⚡ Siap high traffic
- 🔁 Auto renew
- 🧠 Konfigurasi modular
- 🧱 Aman untuk production