Mengirim email dari aplikasi web adalah salah satu kebutuhan dasar tapi sangat penting bagi developer modern. Misalnya untuk:
- Formulir kontak
- Notifikasi sistem
- Manajemen pengguna
Kemampuan mengirim email secara andal menentukan kualitas interaksi aplikasi dengan pengguna.
Masalah umum yang sering ditemui:
- Email masuk folder spam
- Autentikasi gagal
- Error SSL/TLS
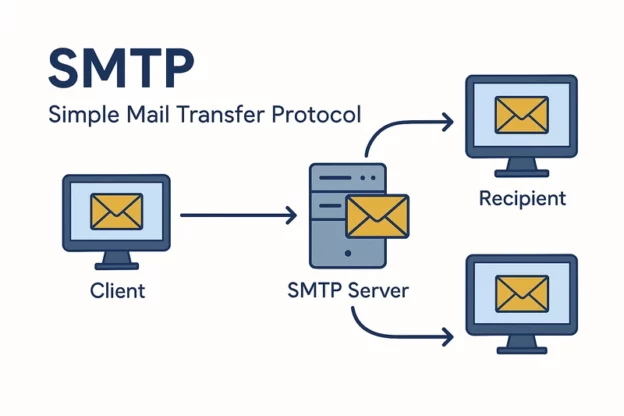
Salah satu solusi terbaik adalah membangun mail server sendiri dengan protokol SMTP + TLS. Dengan cara ini, kamu punya kontrol penuh atas:
- Konfigurasi server
- Autentikasi
- Keamanan email
Integrasi dengan PHP menggunakan library seperti PHPMailer membuat pengiriman email lebih stabil dan terstandarisasi, terutama untuk website atau aplikasi internal.
Panduan ini akan memandu kamu dari persiapan server, konfigurasi DNS, setup Postfix & Dovecot, setup DKIM, hingga integrasi dengan PHP.
Contents
- 1 1. Persiapan Server
- 2 2. Konfigurasi DNS
- 3 3. Setup DKIM Otomatis dengan Skrip
- 4 4. Konfigurasi OpenDKIM
- 5 5. Integrasi OpenDKIM dengan Postfix
- 6 6. Konfigurasi Dovecot untuk SMTP Authentication
- 7 7. Testing DKIM & SMTP
- 8 8. Install Sertifikat TLS (Let’s Encrypt)
- 9 9. Integrasi PHP dengan PHPMailer
- 10 10. Tips Agar Email Tidak Masuk Spam
- 11 11. Debugging
- 12 FAQ
1. Persiapan Server
Disarankan menggunakan Ubuntu 20.04 atau 22.04 karena stabil dan paket lengkap.
Syarat minimum server:
- CPU 1 GB
- RAM 1 GB
- IP publik dedicated
Gunakan subdomain khusus untuk mail, misal: mail.example.com. IP publik harus terbuka untuk port standar: 25, 465, 587.
Install Package Dasar
sudo apt update
sudo apt install postfix dovecot-core
- Postfix → Mail Transfer Agent (MTA)
- Dovecot → Mail Delivery Agent (MDA) & SASL auth
Aktifkan firewall dan buka port email:
sudo ufw allow 25/tcp
sudo ufw allow 465/tcp
sudo ufw allow 587/tcp
sudo ufw enable
2. Konfigurasi DNS
DNS sangat penting agar email tidak masuk spam. Buat record:
- A Record: mail.example.com → 123.45.67.89
- MX Record: example.com MX 10 mail.example.com
- SPF Record: example.com TXT “v=spf1 a mx ip4:123.45.67.89 ~all”
- DKIM Record: mail._domainkey.example.com TXT “v=DKIM1; k=rsa; p=MIIBIjANBgkqh…”
- DMARC Record: _dmarc.example.com TXT “v=DMARC1; p=quarantine; rua=mailto:admin@example.com”
3. Setup DKIM Otomatis dengan Skrip
DKIM (DomainKeys Identified Mail) menandatangani email agar penerima dapat memverifikasi email asli dari domain kamu.
Install OpenDKIM:
sudo apt install opendkim opendkim-tools
Skrip Otomatis: add_dkim.sh
Buat file:
nano add_dkim.sh
Isi:
#!/bin/bash

# Skrip Setup DKIM untuk OpenDKIM
if [[ $EUID -ne 0 ]]; then
    echo "[ERROR] Jalankan skrip ini sebagai root!"
    exit 1
fi

DOMAIN=$1
SELECTOR=${2:-default}
KEYDIR="/etc/opendkim/keys/$DOMAIN"

if [ -z "$DOMAIN" ]; then
    echo "Gunakan: $0 domain.com [selector]"
    exit 1
fi

echo "=== START: Setup DKIM untuk $DOMAIN ==="

mkdir -p "$KEYDIR"
chown opendkim:opendkim "$KEYDIR"
chmod 700 "$KEYDIR"

# Generate DKIM key
opendkim-genkey -s "$SELECTOR" -d "$DOMAIN" -D "$KEYDIR"
chown opendkim:opendkim "$KEYDIR/$SELECTOR.private"
chmod 600 "$KEYDIR/$SELECTOR.private"

# Update KeyTable
KEYTABLE="/etc/opendkim/key.table"
grep -q "$DOMAIN" "$KEYTABLE" || echo "$SELECTOR._domainkey.$DOMAIN $DOMAIN:$SELECTOR:$KEYDIR/$SELECTOR.private" >> "$KEYTABLE"

# Update SigningTable
SIGNINGTABLE="/etc/opendkim/signing.table"
grep -q "$DOMAIN" "$SIGNINGTABLE" || echo "*@$DOMAIN $SELECTOR._domainkey.$DOMAIN" >> "$SIGNINGTABLE"

# Update TrustedHosts
TRUSTED="/etc/opendkim/trusted.hosts"
grep -q "$DOMAIN" "$TRUSTED" || echo "$DOMAIN" >> "$TRUSTED"

# Postfix ke grup opendkim
usermod -aG opendkim postfix

# Restart services
systemctl restart opendkim
systemctl restart postfix

# Tampilkan TXT record untuk DNS
cat "$KEYDIR/$SELECTOR.txt"

# Cek key DKIM
opendkim-testkey -d "$DOMAIN" -s "$SELECTOR" -k "$KEYDIR/$SELECTOR.private" -vvv
Jalankan:
chmod +x add_dkim.sh
./add_dkim.sh example.com default
4. Konfigurasi OpenDKIM
File: /etc/opendkim.conf
Syslog                  yes
SyslogSuccess           yes
Canonicalization        relaxed/simple
OversignHeaders         From
UserID                  opendkim
UMask                   007
Socket                  inet:8891@localhost
PidFile                 /run/opendkim/opendkim.pid
TrustAnchorFile         /usr/share/dns/root.key
KeyTable                /etc/opendkim/key.table
SigningTable            refile:/etc/opendkim/signing.table
ExternalIgnoreList      refile:/etc/opendkim/trusted.hosts
InternalHosts           refile:/etc/opendkim/trusted.hosts
Pastikan file:
/etc/opendkim/key.table/etc/opendkim/signing.table/etc/opendkim/trusted.hosts
Sudah benar dan sesuai domain.
5. Integrasi OpenDKIM dengan Postfix
File: /etc/postfix/main.cf:
# Host
myhostname = mail.example.com
mydomain = example.com
myorigin = $mydomain

inet_interfaces = all
mydestination = localhost, localhost.localdomain, mail.example.com
mynetworks = 127.0.0.0/8

# TLS
smtpd_tls_cert_file=/etc/letsencrypt/live/mail.example.com/fullchain.pem
smtpd_tls_key_file=/etc/letsencrypt/live/mail.example.com/privkey.pem
smtpd_tls_security_level = may
smtp_tls_security_level = may

# AUTH via Dovecot
smtpd_sasl_type = dovecot
smtpd_sasl_path = private/auth
smtpd_sasl_auth_enable = yes
smtpd_sasl_security_options = noanonymous
smtpd_recipient_restrictions =
    permit_sasl_authenticated,
    permit_mynetworks,
    reject_unauth_destination

# RELAY RULE
smtpd_recipient_restrictions =
 permit_sasl_authenticated,
 reject_unauth_destination

# DKIM
# DKIM milter
milter_default_action = accept
milter_protocol = 6
smtpd_milters = inet:localhost:8891
non_smtpd_milters = $smtpd_milters
Tambahkan Postfix ke grup opendkim:
usermod -aG opendkim postfix
systemctl restart opendkim
systemctl restart postfix
File /etc/postfix/master.cf:
submission inet n - y - - smtpd
-o syslog_name=postfix/submission
-o smtpd_tls_security_level=may
-o smtpd_sasl_auth_enable=yes
6. Konfigurasi Dovecot untuk SMTP Authentication
Virtual Users (SMTP Only):
smtp@example.com:{plain}password1
smtp@example.com:{plain}password2
Dovecot SASL Config (/etc/dovecot/conf.d/auth-passwdfile.conf.ext):
passdb {
  driver = passwd-file
  args = /etc/dovecot/smtp-users.txt
}
userdb {
  driver = static
  args = uid=1000 gid=1000 home=/nonexistent
}
Postfix Main.cf:
smtpd_sasl_type = dovecot
smtpd_sasl_path = private/auth
smtpd_sasl_auth_enable = yes
smtpd_relay_restrictions = permit_mynetworks, permit_sasl_authenticated, defer_unauth_destination
Dovecot Socket (10-master.conf):
service auth {
  unix_listener /var/spool/postfix/private/auth {
    mode = 0660
    user = postfix
    group = postfix
  }
}
Restart:
systemctl restart postfix dovecot
systemctl enable postfix dovecot opendkim
sudo systemctl daemon-reload
7. Testing DKIM & SMTP
swaks --to test@gmail.com \
      --from admin@example.com \
      --server mail.example.com \
      --port 587 \
      --auth LOGIN \
      --auth-user mail_user \
      --auth-password 'password_kamu' \
      --tls
Cek DKIM di Gmail: “Show Original” → pastikan ada DKIM-Signature
8. Install Sertifikat TLS (Let’s Encrypt)
sudo apt install certbot
sudo certbot certonly --standalone -d mail.example.com
systemctl reload postfix dovecot
Hook otomatis agar cert diperbarui:
sudo nano /etc/letsencrypt/renewal-hooks/post/reload-mail.sh
sudo chmod +x /etc/letsencrypt/renewal-hooks/post/reload-mail.sh
9. Integrasi PHP dengan PHPMailer
File: send_email.php:
<?php
require 'PHPMailer/PHPMailer.php';
require 'PHPMailer/SMTP.php';
require 'PHPMailer/Exception.php';

use PHPMailer\PHPMailer\PHPMailer;
use PHPMailer\PHPMailer\Exception;

$mail = new PHPMailer(true);

try {
    $mail->isSMTP();
    $mail->Host       = 'mail.example.com';
    $mail->SMTPAuth   = true;
    $mail->Username   = 'mail_user';
    $mail->Password   = 'password_kamu';
    $mail->SMTPSecure = 'tls';
    $mail->Port       = 587;

    $mail->setFrom('admin@example.com', 'Example Notif');
    $mail->addAddress('abc@gmail.com', 'Admin');
    $mail->addReplyTo($_POST['email'], $_POST['name']);
    $mail->isHTML(true);
    $mail->Subject = $_POST['subject'] ?? 'Message from website';
    $mail->Body    = nl2br($_POST['message'] ?? '');
    $mail->send();
    echo 'Message has been sent';
} catch (Exception $e) {
    echo "Message could not be sent. Mailer Error: {$mail->ErrorInfo}";
}
10. Tips Agar Email Tidak Masuk Spam
- SPF, DKIM, DMARC harus benar
- Gunakan subdomain khusus mail
- Hostname FQDN sesuai sertifikat
- Hindari shared IP reputasi buruk
- Hindari kata-kata spam di subject/body
11. Debugging
- Postfix log:
tail -f /var/log/mail.log - Dovecot auth:
doveadm auth test mailuser - Tes SMTP:
swaks --tls
Ringkasan Arsitektur:
Client (PHP Form) --> PHPMailer (SMTP TLS 587) --> Postfix (MTA) --> Internet
                                        \
                                         -> Dovecot (SASL Auth)
FAQ
Masalah sering muncul opendkim tanda tangan email gagal dan email tidak terikirim (pending di antrian) :
Can’t open PID file /run/opendkim/opendkim.pid (yet?) after start: Operation not permitted
Solusi:
sudo systemctl edit --full opendkimubah kode:
[Unit]
Description=OpenDKIM DomainKeys Identified Mail (DKIM) Milter
Documentation=man:opendkim(8) man:opendkim.conf(5) man:opendkim-genkey(8) man:opendkim-genzone(8) man:opendkim-testadsp(8) man:opendkim-testkey http://www.opendkim.org/docs.html
After=network.target nss-lookup.target

[Service]
Type=simple
ExecStart=/usr/sbin/opendkim -x /etc/opendkim.conf -f
User=opendkim
Group=opendkim
UMask=0007
Restart=on-failure
ExecReload=/bin/kill -USR1 $MAINPID

[Install]
WantedBy=multi-user.target
Langkah selanjutnya:
- Reload systemd:
sudo systemctl daemon-reload
- Restart OpenDKIM:
sudo systemctl restart opendkim
- Cek status:
sudo systemctl status opendkim